Wednesday, December 30, 2015

More Birthday Shenanigans...

Everyone knows when you go to the zoo, aquarium, theme park, etc., they always have cutouts for you to stick your face in and say "cheese." I thought that would be a cute idea to create something for my son's birthday party. I designed a poster on a program I have and I am having it printed out by Office Depot. When you have it printed make sure you add the option on for foam backing. This will mount it to the board without you having to go out and buy board and line it up yourself.

Once you get the board, you will cut out a circle around the face and "voila" you have your cut out for pictures and your party is ready to go.


Monday, December 28, 2015

Valentine's Day

February is approaching quickly, so in my spare time I have already designed the label for my son's preschool class gift. These will be with shovels and Valentine's Day candy in a clear bag. I will post pictures of the finished gift.

ABC...XYZ

My son's bedroom is in a nautical theme. He has a huge wall on one side of his room, so I had to think of something that would look good there and fill the space. I decided I wanted to do the alphabet, but I did not want all the letters to be plain and boring. I went to Hobby Lobby and bought the letters in all different sizes and fonts (and yes I laid the whole alphabet out on the floor in the aisle until it looked right). The letters can add up quickly, so buy a few at a time or get someone to go with you and use the 40% off coupon on the bigger letters. I had my mom with me, so she used a coupon and bought a letter to help save money...trust me it adds up!!! 

Once I had all the letters, I had to paint them. I bought the cheapest acrylic paint and used 5 different colors: mint, navy, white, cream, brown...sounds odd, but it looked cute. Since my son's room is in a nautical theme, I wanted to try and tie in some of the letters with nautical decor, but I only ended up using a wheel for the letter "o" and it still looks adorable. 

Total for the project estimated about $50


Thursday, December 17, 2015

Our Family Christmas Pictures - 2015

A big thank you to Amber Eason Photography for our wonderful Christmas pictures. Merry Christmas!


Farm Theme Birthday Party - Getting Ready

My son's 2nd birthday is coming up in January and we are doing his party in a "farm theme." Here is a poster I designed and I love how it turned out. I also made place cards for each of the food items we are having. 


You may print and use these. 

Chicken Feed - Chex Mix


Baby Chicks - Chick Fil A nugget tray


Farm Fresh Eggs - Deviled Eggs


Hay Bales - Rice Krispie Treats


Cozy Pigs - Pigs in a Blanket


Tractor Tires - Chocolate Covered Donuts


Pitch Forks & Shovels - Utensils


Cameron's Vegetable Garden - Veggies
(These will be going in veggie baskets as seen below, click on the link to see where I purchased them)


6 qty. Pint Berry Baskets, Berry Till, Aqua Green Paper Pulp Basket, Wedding Favor Basket, Farm Theme Party Favor, Spring Basket


Monday, December 7, 2015

Dining Room

I will be posting some of the work from each room as I put some final touches on each room. The dining room is by far my favorite of the house. 

To recap your memory from a previous post, this was once the sun room. There was a wall and a door that went out to this room.


We removed the wall and door, painted the hardie plank walls and had laminate hardwood floors put down. The light fixture changed and it made a huge difference. 

My farmhouse table finally arrived!! The dining table actually came from Target. I used metal dining chairs for a rustic, yet modern feel in the home. 


Tuesday, December 1, 2015

OUR FIXER UPPER!!!

I have been waiting and waiting to post this blog. I am still not completely finished with decorating and unpacking, but I wanted to share some before and afters of our house. We are so happy with how everything has turned out. I will post more pictures once the decorating is finished.

When we first saw this house, my husband said there is no way we are going to buy this house. He thought it was a complete dump and was having no part in it. I told him over and over to have an open mind and to just put his full faith and trust in me. He was still hesitate about it, but he knows "A Happy Wife is A Happy Life", so he went with it. We still have to add the shutters back and do some landscaping.

This was the first time we saw the house...it was a bit intimidating, but it just needed some TLC! 


We did some landscaping to clear out all the trees and shrubs just to be able to see the house. 


Here is the back and side views of the house. We really did not have much landscaping to do to the back. We did cut the tree down that was growing on the side of the house, so it did not give us problems later.


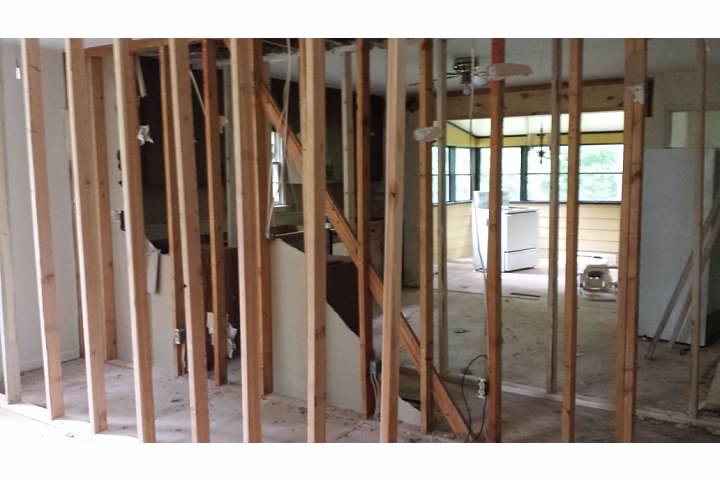
 Here are some pictures that were taken from the demolition work being done.


House - Before/After
Keep in mind shutters and landscaping are not complete yet.
We painted the exterior Dorian Gray from Sherwin Williams. The porch rails were redone to have a more farmhouse look. All the trim was repainted white and the porch was painted a darker gray to match the house and a we replaced the light fixture by the door. We will be replacing the brown lattice and putting shrubs in front of it (I will of course post pictures once we get it completed) 

Before
After
Before
After

Bedroom #1 (Master) - Before/After
The interior of the house was painted Repose Gray from Sherwin Williams. We chose to add the hardwood floor in our bedroom and use an area rug for an accent, but we replaced the carpet in the other two bedrooms because we knew having a clumsy little one, he would need the extra cushion and hopefully the third bedroom will become a nursery in the near future. All the light fixtures were replaced in each room of the house.

Before

After

Bedroom #2 

Before

After


Bedroom #3

Before


After


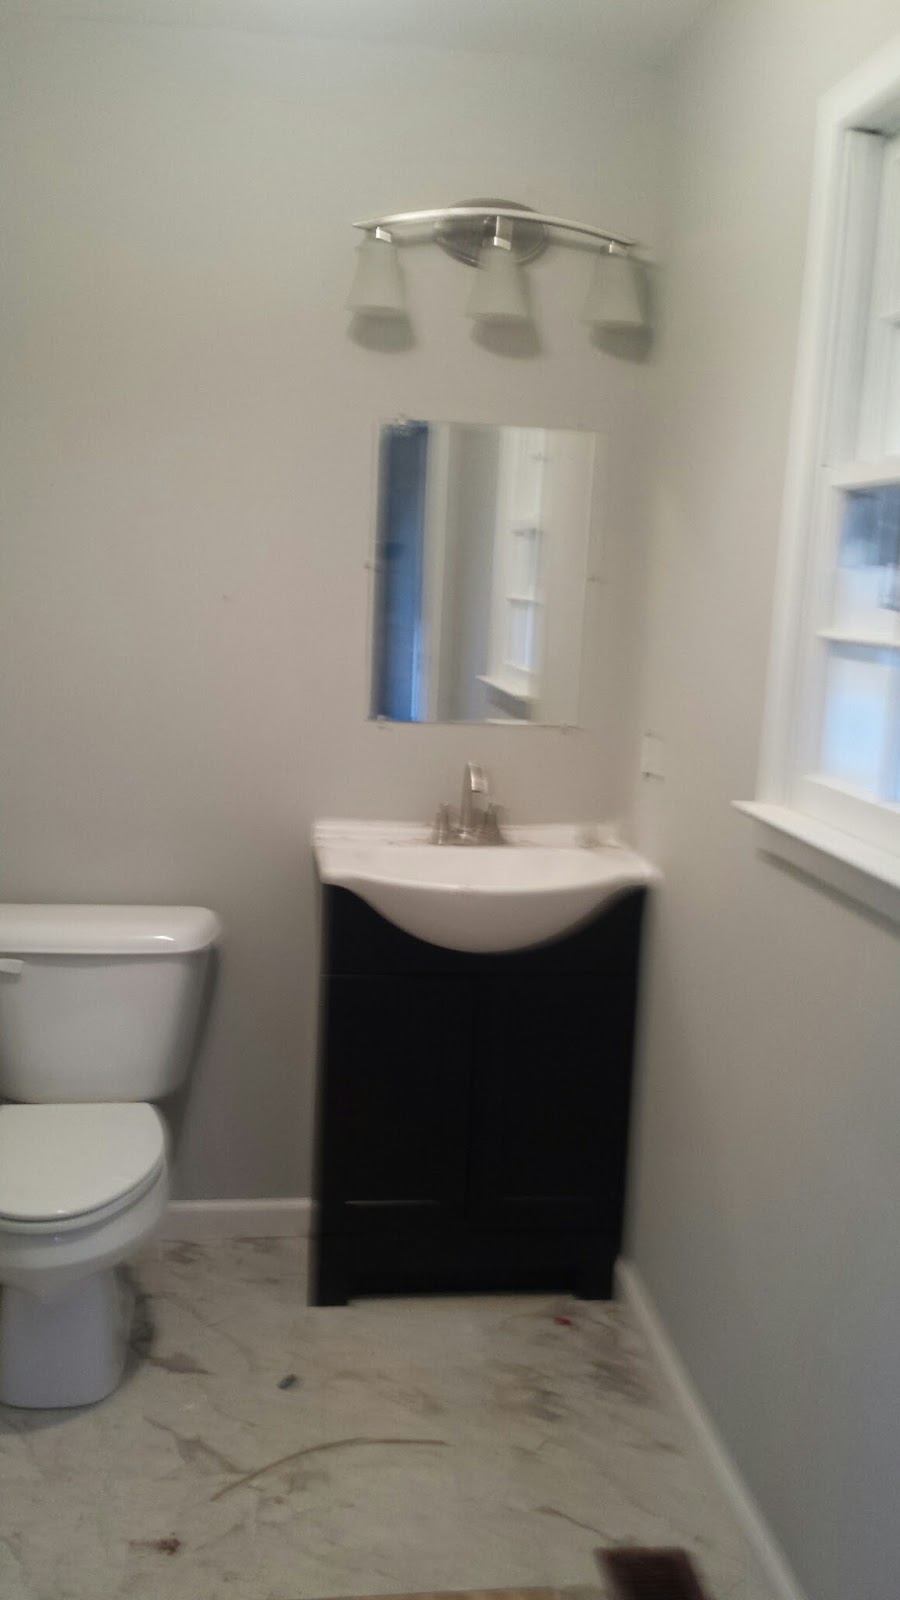
Bathrooms - Before/After

Hall Bath

Before


After


Master Bath 

Before


After


Laundry Room

Before


After


Sun Room/Dining Room

Before


After


Kitchen
We added all new stainless steel appliances and had granite counter tops put in. The wall was taken down and we added a breakfast bar. 

Before


After


Pantry
We turned the coat closet into a pantry and I must say, I love how it turned out.

We had all new doors and door frames put in.


Living Room

Before


This is probably the only room that is completely finished in the house with all the decor & of course our Christmas tree!

After


I hope you love our home as much as we do. It was a long 9 weeks of renovating and waiting for everything to be finished, but we are thankful for all the workers involved in making this absolutely beautiful. We still have some moving and unpacking to do and some landscaping on the outside.

MERRY CHRISTMAS & ROLL TIDE!